
In this article, we will guide you step by step on how to fill in your onboarding wizard with the required Go-to-market information for us to customize the platform based on your needs. It’s extremely easy & quick to fill out.
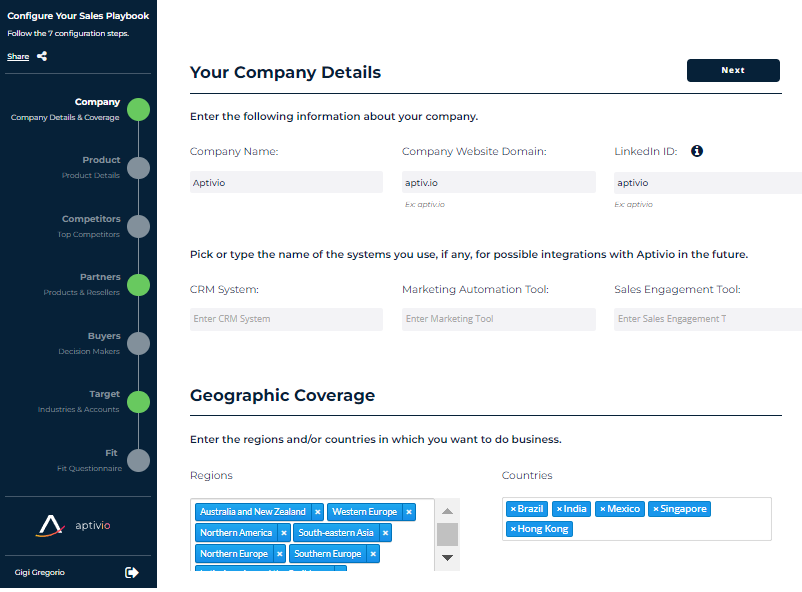
First, you will be asked to fill in your Company details. Such as your Company Name, Website Domain, and CRM System. You will also indicate what territories you are focusing on, as seen in the example below:
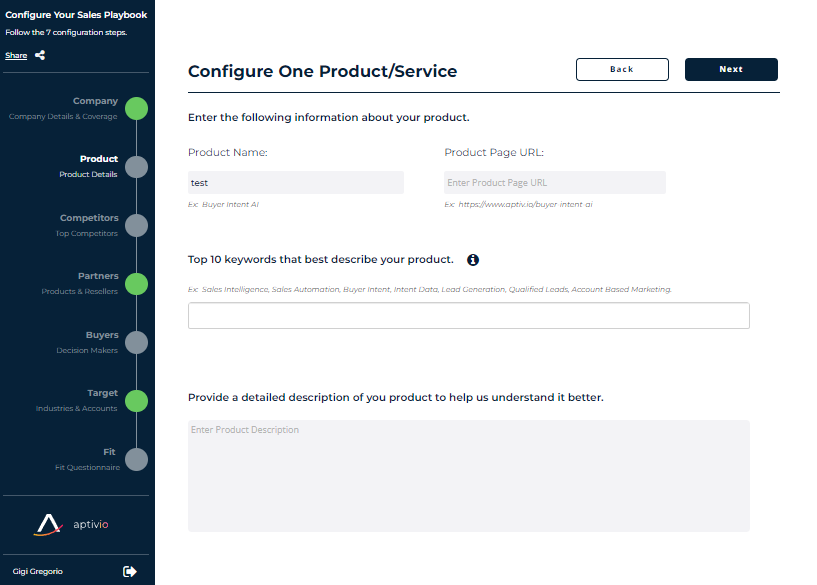
Next, you will add your Service/ Product you wish to configure in Aptivio. From here, you will add the Product Name & Page URL as well as 10 Keywords that best Describe your product.
Pro Tip: The more Specific Keywords, the better results you will receive. Make sure you enter two-word keywords.
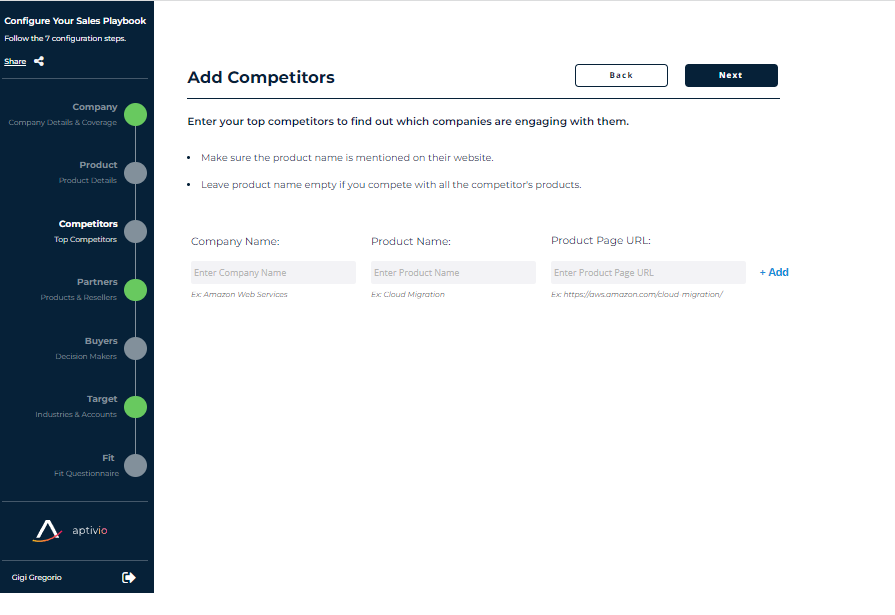
To alert you if a buyer is visiting your Competitors' websites, we’d like to know who they are. Please enter their company name, product name, and exact product page URL.
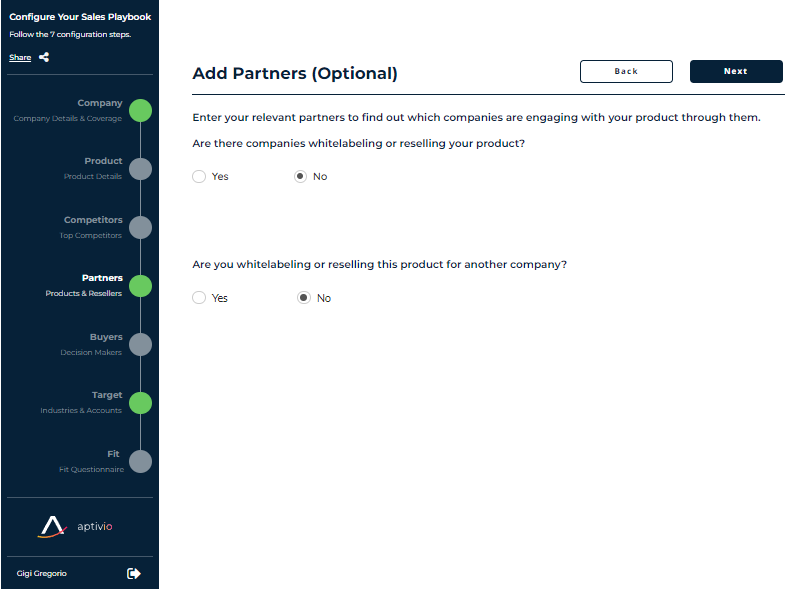
Similarly, we can alert you when there is Partner Overlap to engage your Ecosystem. If you don't have any partners, please select no as in the example below:
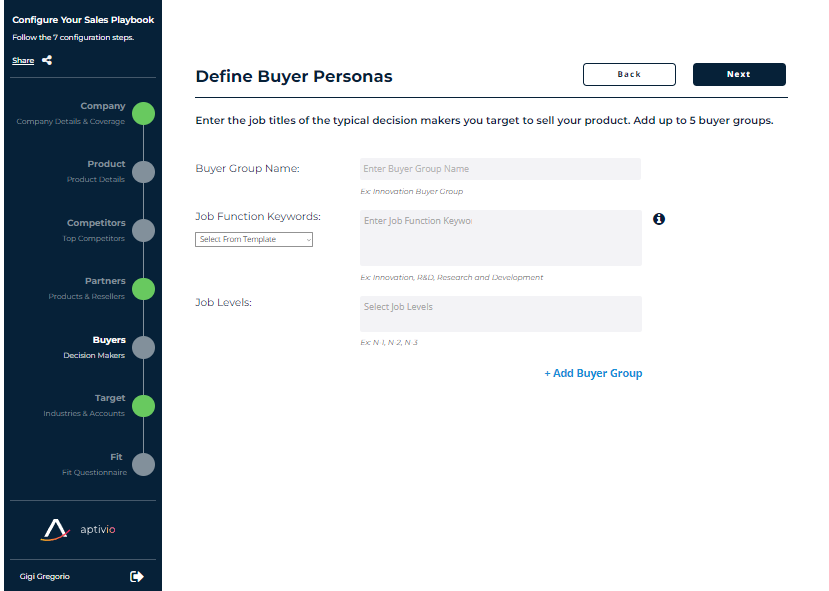
Moving on, you can select up to 5 buyer groups per product. Each buyer group consists of job function keywords and job levels.
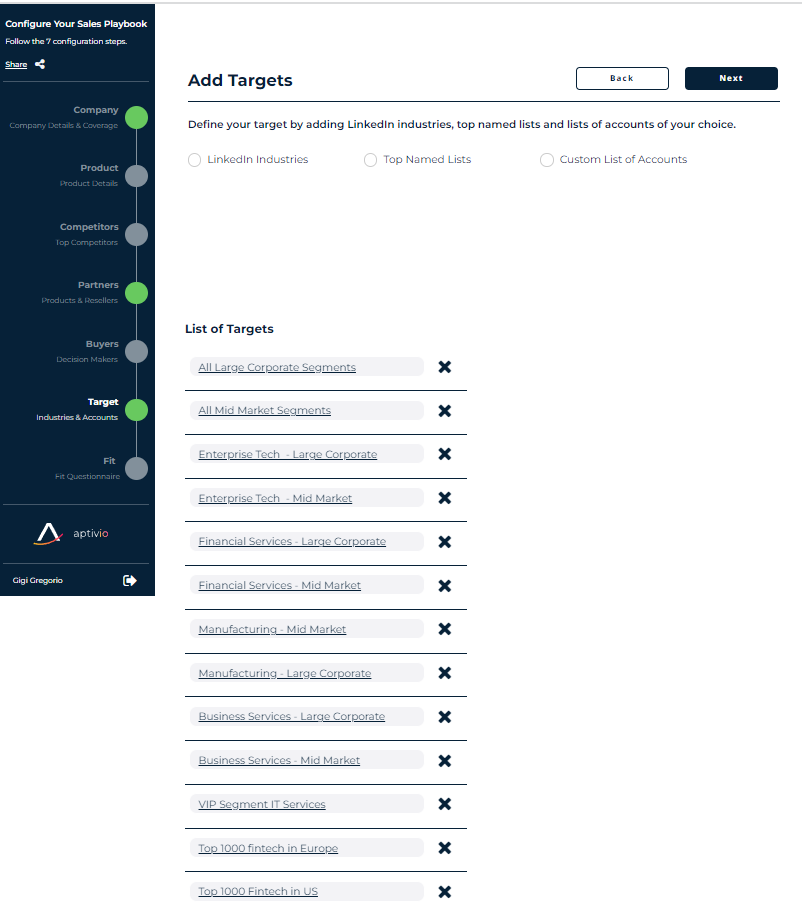
Under Target you have three options to select from:
- A named list (i.e top 100 fintech companies).
- A dynamic list; where you can select or exclude any LinkedIn industries and choose a Revenue Range.
- A static list refers to any specific list of companies that you want us to monitor by uploading a csv file.
Lastly, for our advanced signals you can select any of the options below, and/or configure a customized signal: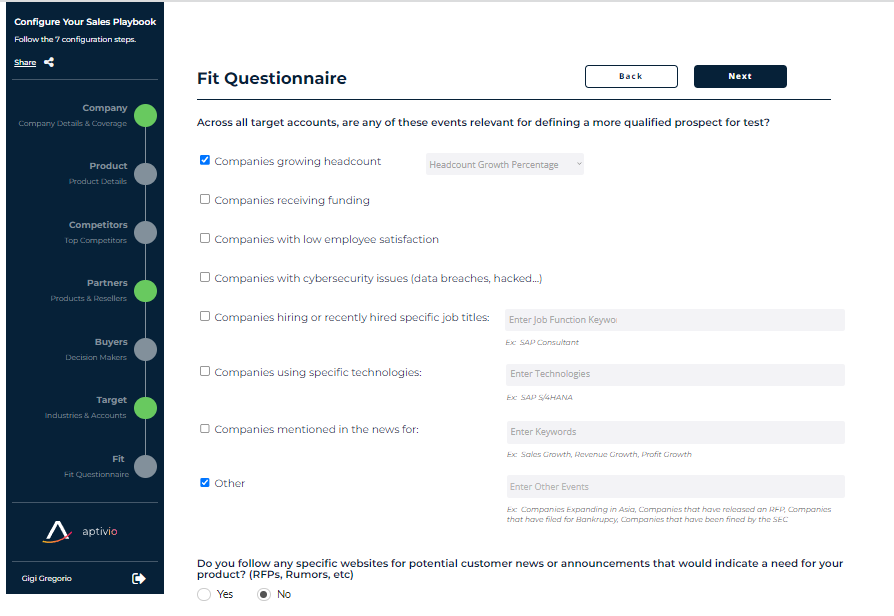
Congratulations, you have completed your Onboarding Wizard :) If you have any questions, please reach out to your Customer Success Manager.